
Have you ever seen a water stain on your ceiling after it rained and experienced a wave of anxiety? You’re definitely not the only one! The Flat Roof Company has prepared the best guide for you. This Shingle Roof Repair guide to repairing shingle roofs step by step will teach you to be the boss, quickly fix leaks, and make your home safe and dry. By following our basic rules for Shingle Roof Repair, you will gain the confidence to handle small roof problems, stop them from becoming expensive, and enjoy peace of mind.
Patching Leaks: Your Step-by-Step Guide to Shingle Roof Repair
A roof that leaks can very quickly change the situation from just tiny spots of moisture to big, expensive damage to the house. Understanding Shingle Roof Repair is very important so you know how to fix problems early and what steps you should take to increase your roof’s longevity.
Keep reading this step-by-step guide to Shingle Roof Repair:
-
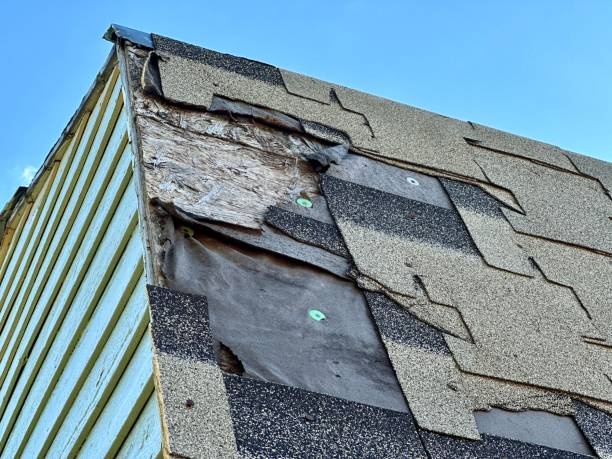
Step 1: Start With a Simple Roof Inspection
Calm, careful inspection should be made before taking any tools for Shingle Roof Repair. Head into your attic first and check for water spots, wet areas, dark stains, or small pinholes that allow sunlight to enter. These signs can guide you toward the exact leaking point. Once you analyze the damage whether it’s a missing or broken shingle, a leaking roof, or mildew growth take immediate action with proper Shingle Roof Repair to prevent further damage and ensure the integrity of your Residential roofing.
-
Step 2: Gather Your Tools and Materials
It is easier to repair the roof when you do not have to use the ladder ten times going up and down. So, make sure to prepare yourself before climbing the ladder. Here’s what you’ll need:
|
The Repairing Toolkit! |
|
|
|
|
|
|
|
|
|
-
Step 3: Gently Remove the Damaged Shingles
You need to be very careful during this step of Shingle Roof Repair! Lift the shingle over the damaged one with a pry bar, taking care not to tear it. This will expose the nails that hold it in place. Poke the nails out, slide the shingle, and remove it. Gently take off the damaged shingles—don’t rush, just take it easy during Shingle Roof Repair to avoid further damage.
After doing so, look at the underlay. In case it appears mushy, torn, or mouldy, that part should be changed as well. You do not want to put on a shingle and leave the one under you hollering!
-
Step 4: Install Your New Shingles
This is one of the most important steps in Shingle Roof Repair. Take your new shingle and slide it into the vacant position so that it fits well with the adjacent ones. One nail should be below the strip of tar but not above it, so the next row will cover the nail and safeguard it. To provide additional stability, a dab of roofing cement on the bottom corners of the shingle may be added. This helps it stay in place during wind and stormy weather, ensuring a more durable Shingle Roof Repair.
-
Step 5: Seal Every Weak Spot
It is sealing time when the new shingle is installed during Shingle Roof Repair. Check for loose edges, exposed nail heads, tiny gaps, and cracks in the flashing. Apply roofing cement to seal everything properly. Think of it as providing your roof with a last line of defense, ensuring the effectiveness of your Shingle Roof Repair.
Make sure to be careful about chimneys, skylights, and vents because they are a great thing to trifle with. When you have finished sealing it back, take a proud look at your job because you have an official leak-proof roof.
Conclusion
DIY roof leak repair using shingles can be scary, but if done properly, Shingle Roof Repair will not take too long and will save you money. Regular roofing inspections, gathering tools, damaged shingle removal and replacement, and effective sealing of all the spots ensure that your house will be protected from rain and snow in all seasons.
The durability of a roof depends on its maintenance, and it also leads to the homeowner’s peace. Be happy with your skill and know that easy and regular maintenance will not only keep your roof in good condition but also avoid costly repairs and troubles in the future.
FAQs
What is the average time of shingle roof repair?
Depending on the damage, it normally takes 1-3 hours.
Is it possible to repair a roof when it is wet or raining?
No, never improve on a wet roof.
What is the way of knowing whether a shingle is bad?
In case it is broken, twisted, lost, or shedding granules–change it.
Using roofing cement provides a long-term repair?
It is a working approach in the short term; however, repairing is preferable.
What is the frequency of roof inspection?
Not less than two times a year, such as spring and fall.